I really like this particular way to use the Top Note die, and love the 2 layers of it. The vase is made using an oval punch, a circle to create the top and scissors to cut the bottom straight.

I tend to make a few colours and designs when I create and I really like the rich razzleberry colour! I Especially like the Ribbon and the metal buckle, but unfortunately they are both retired from Stampin' Up, so I am just using my stash for these ones

Inside of the card, used the outline from the top note :-)

Liked the monocromatic look, especially with the old navy cardstock. It goes well with the very vanilla. For this one I used some organza with the brass buckle, and it is my favourrite by far!

Close up of the buckle detail :-) Yeap, I like it that much.

Old olive anyone? Well, enough of the brass buckles, here is some scruffy yarn I had in my ribbon stash. Oh, and mixed it up a little, moved from the little rhinestones to the pearls.

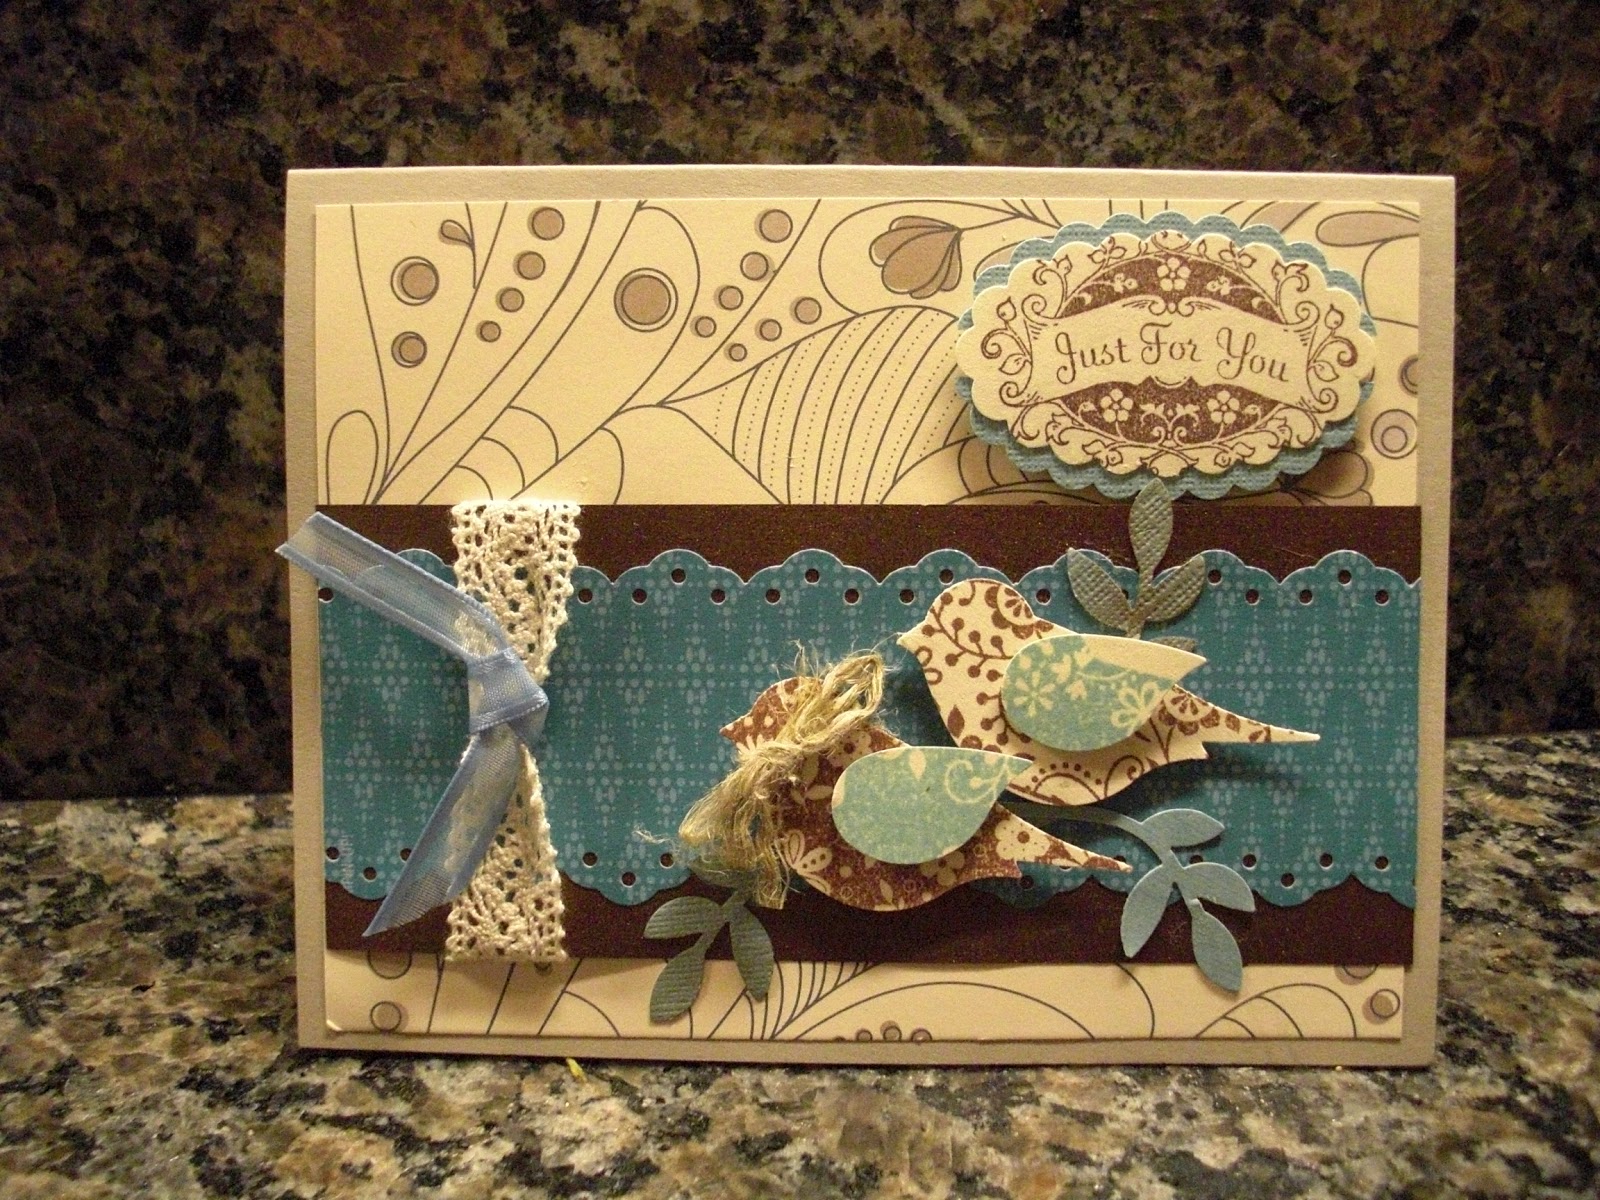
TWO Little LOVEBIRDS....Probably my favourite punch from Stampin Up is the bird builder. For the birds I just stamped a lovely flower pattern stamp onto very vanilla cardstock and then punched the bird. Used Chocolate chip for the body and tempting turquoise for the wings. Add some lovely Designer Series Paper (DSP) to the background, layer some chocolate paper and more DSP, this time on blue to match the birds and add some Chantilly Ribbon, and there you have it, a lovely easy card. I was not sure what I would use it for, so the sentiment is Just for you, so it could be used for any occasion really. The sentiment stamp is from a set called Tagtastic also by Stampin' Up (probably should not mention seeing as all my stamps are from them).
Same idea on sage background this time, and with a hardware frame from the hodge podge collection.

This is the card I made for the swap at the monthly get together with my stamping girlfriends. The flowers were made using a technique called paper quilling. Just add some DSP, a lovely scalloped edge, pearls, ribbon and buttons and you have a lovely card. And guess what? I did not use ANY stamps on this one.
It's a lot of fun and the end result looks amazing! But I would not want to have to make 30 of these!!! 10 were enough for me.

Close up of the flowers.

I have also used my morning in a very productive way, I have finished my order for the 30 birthday invitations!!!! And here is the proof

Now I just have to make the matching thank you cards, stamp the back and put the inside piece with all the party details and it will be my first completed order. Now I just have to start working on the other pending ones....
That's it for tonight, hope you enjoyed my creations and hope you come and visit often. Feel free to share my page with your friends :-)
Hugs,
Renate
PS. Thanks to my beautiful sister-in-law for proof reading and pointing out the mistakes :-). We can swap professional services


Michelle VanWiggeren | March 5, 2012 at 11:35 PM
These are all so beautiful, Renate! So happy to have one of your quilled flowers cards! And, congrats on finishing the birthday invitations. They look wonderful!
Renate Krogdahl | March 6, 2012 at 7:42 AM
You were up so late too last night! I think it was am when we went to bed...Thank you very much and thanks again for the stamp set :-) very grateful