For those of you that are following my blog and wondered what has happened with me, well, I'm still around, still crafting, just haven't put the time aside to actually post any of the things I have done.

A lot has happened since my last post. March and April we had adventures in Europe, France, and Connecticut (east coast of the US where we used to live a while ago, for my Aussie friends), changed a leaf in the passing of time as I joined my friends in their thirties (I was told the thirties are great and if you all lied to me I will not be very happy!) , came home and were sick for a while and then we had wonderful friends from Australia come and visit. (Jeremy and Shiami it was an ABSOLUTE pleasure to have you guys over, and we treasured every minute of it! We love you guys!)


Jamie had to go to Paris for a conference with work and seeing as it was around my 30th birthday I thought it would be just perfect to tag along! And my mum was able to join us for a few days and we surprised my grand'ma with this trip also! 
 Champs Elysees 
 Bateau mouche sur la Seine
 Saint Malo on the west coast of France, in Brittany (we spent about 5 days here)
 Jamie and our beautiful muffins
 Jamie's artsy shot


When we were in CT I had the pleasure to stay with two of my dearest girlfriends, Rebeca and Marta and I even got treated to going out with the girls about 3-4 times!! Thanks to Rebeca's wonderful mum who offered to watch the kids! Thank you Lidia :-)

Well after the long 4 week holiday was finished and we came home (Jamie had come home after France as someone has to do paid work to support all these overseas trips right? Thanks hon, I love you) we all got sick. That was downright nasty! Jamie managed to get this really bad flu from somewhere and brought it home and was bed ridden for nearly a week. And when Jamie does not get out of bed a whole day, you know its really bad!! I mean he didn't even go to the garage or his CAD work....he was really sick. After 5-6 days I thought, gee this is really good, I've managed to not get this, my immune system is awesome! And then the next day that was it! Sure enough it lasted about the same, one week, but I have to say it was a very long week looking after the kids when you're sick and tired and the kids bounce of the walls...I had never been so sick in my life and don't ever want to experience the flu again! Miserable miserable week!

And then we were blessed to have fear friends from australia visit for 9 days! This is how I get to go into SF and do touristy things! Loved every minute of their visit and was very happy to see them again. And I was also in for a treat, Shiami did some Sri Lankan cooking :-)))

and and and....and that brings me to today...

I thought it was about time to get my act together and publish some of the things that I have been up to....

One of the girls at church had a baby and I was thought it would be nice to make a new card for her. I had some in my box, but they were more boyish ones, and I wanted a very girly one for this new little baby girl. So this is what I came up with.


I used a retired Stampin' Up set with lots of babies (not sure of the name as I do not have the box), but it is very versatile. I did not have a current baby set to use, and this one is so very cute! The saying is from a SU set called For a Friend.

Not sure how visible it is from the pics, but it is actually a window card, the baby pics are punched with a square punch and glued to the card itself. Above it there is a layer of Melon Mambo cardstock in which I had punched 3 windows with the same square punch and adhered that with 3 dimensional foam to make it pop.

I then used a layer of the lovely DSP Cheerful Treat in melon mambo and Wasabi (unfortunately that is retired also, pity it was my favorite!) and then glued the sentiment on the curly label punch, layered another one underneath and attached them with 3D foam.


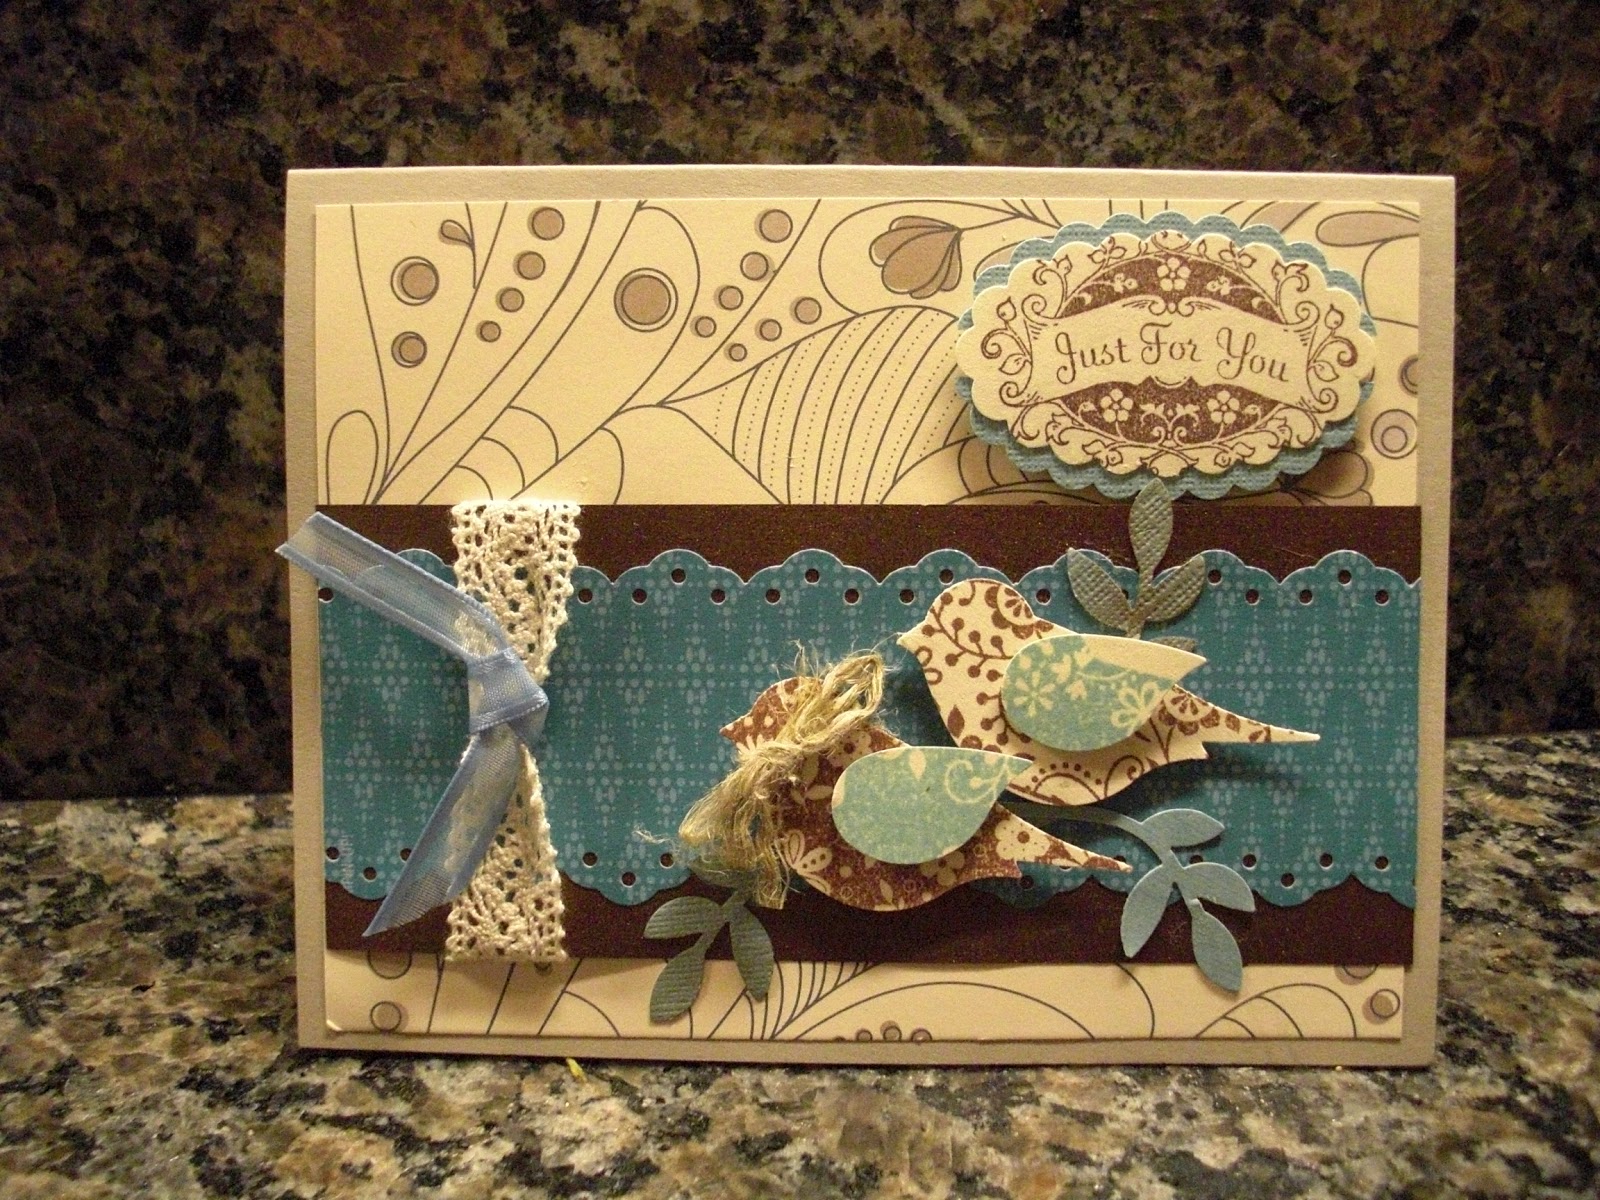
BIRDIES, BIRDIES, BIRDIES!! 

I had a few days of mad crafting and made a few cards that I had been wanting to make for a long time! I have a whole folder on my computer with cards that I want to try to use as inspiration. Finally it was birdies time. This one is greet as there is no stamping! I used the bird punch for the front, but added 2 wings on the birdie. I thought it would look really nice to add another wing in the DSP paper that i used on the left panel. Only the last card uses Stampin Up Designer paper, I had some really nice paper leftover from my kids scrapbooks and I wanted to use it. The orange and pink ones are really beautiful, shimmery and embossed. The orange ones went really well with the Pumpkin Pie and Old Olive Cardstock, and for the pink one i used Rich Razzleberry and Very vanilla.

For the inside I chose to add the top note die cut with the Sizzix Big Shot- this has got to be the most versatile and used die SU sells!-.

The card is the normal size, but the front is folded in the facing the outside and then it is tied with a a ribbon. I love the effect this gives. I sent the bottom one to Elizabeth, my sister in law and she really liked it :-)


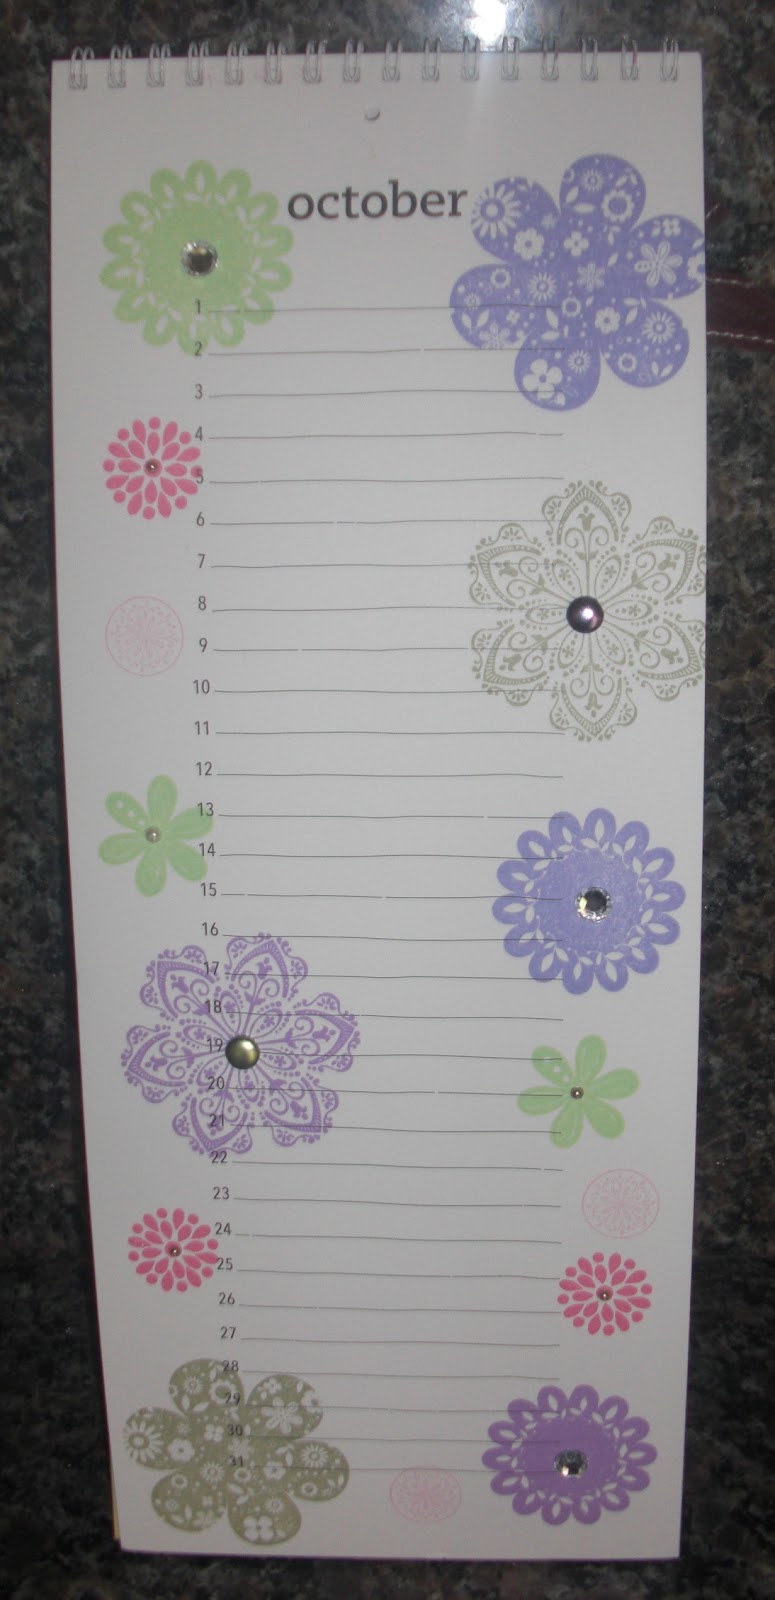
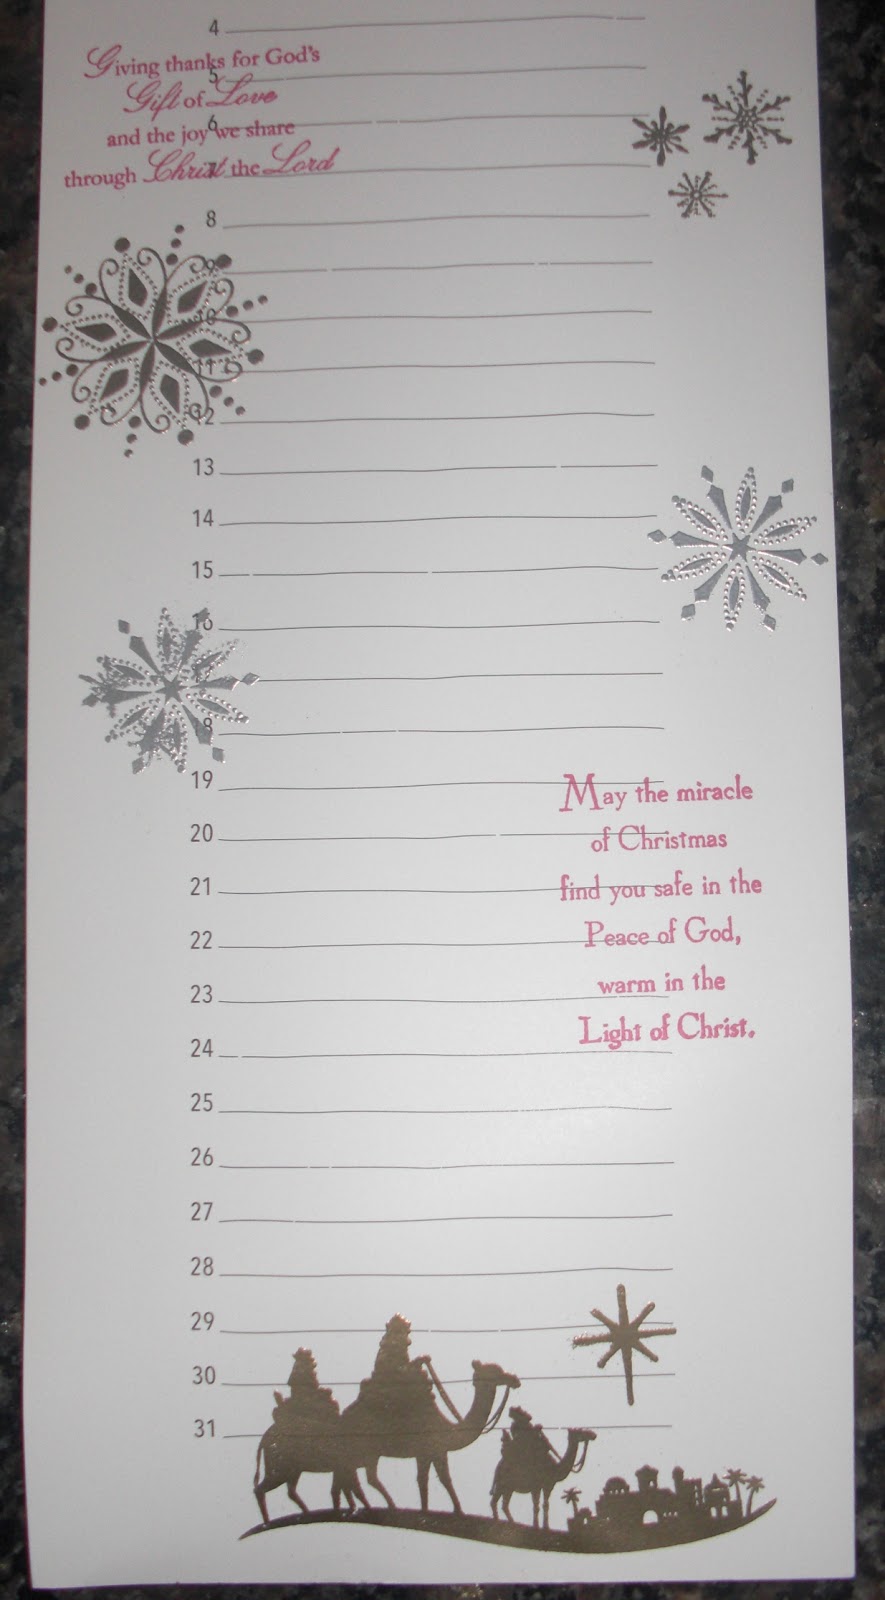
Well, if you've made it this far, congrats on your patience! I promise I will try to be slightly more consistent with my posts. I have quite a few more projects to share, including some birthday calendars that the girls made at my FIRST calendar class!!! Thanks for coming :-)

Hugs,
Renate

I have had an order for a calendar from someone in Australia and I was wanting to make one for my lovely mother in law for her birthday. Well, I had enough time for hers seeing as her birthday is is July, but because she was over at our place in California, and I was making the other one to send with her back home, I was only natural that I make 2 at the same time. Actually, make that 3, as I also finished one I was meant to send to another girlfriend of mine back in Connecticut. (dropped it off as I stayed with her for a while while visiting). Sorry it has taken me so long Rebeca :-(.

This was a great opportunity to use some new stamps I had acquired from a friend's friend who was getting rid of her stamping stuff. I do have to say I was in stamping heaven when I saw all this girl was wanting to get rid off....Do I have to even say I bought a lot of it? And I mean A LOT! So this was a fab opportunity to use some new stamps...

 Mum got to choose the design of her cover, seeing as she was there...
 Beachy summery theme for January (retired Sealife stamp set)
Lovely as a Tree stamp set used for the Woodland wonderland for the winter months...
Funky Four, Fox and Friends, and Owl Builder Punch used for this page
Printed Petals and Mixed Bunch Sets
 Changed the stamp set for the Christmas month to Come to Bethlehem and I have to say I wish I had used this one for mine. I LOVE how it turned out!!! The snowflakes are from Snow Swirled, the set I used to January in my calendar. The wise men and the snowflakes are embossed with gold, silver and pewter embossing powder. This really makes them pop off the page.


Mum liked it so much she wanted one for one of her girlfriends back home. I loved that she told me then and there rather than a few months later. So much easier doing 3 at the same time rather than at 3 different times.

Hope you enjoy it,

Hugs,
Renate

Probably the cutest thing yet :-)

One of my lovely friends in California is a piano teacher and she was having a recital for her students in mid April. When I was talking one time about my new little hobby she asked me if I could come up with a program and an invite for her event. This was at the beginning of March. Let me say she is awfully organized - she is our party planner :-) Hugs Tin :-)))), and she thought of it quite a while in advance.

Of course I could come up with something but what??? So I started to think about different cards and then the gate fold card came in mind, and i thought this was perfect for the piano recital, as it looks like a curtain being drawn from the stage. How cute?

Well anyway I went through my stash of papers and found the cutest little combination for spring, a wild wasabi green and the cutest hot pink to go with it (the name escapes me, forgive me it has been 3 weeks since I have crafter, oh my I am having withdrawals....it is bad!).  Also had the perfect designer paper to go with it! Awesome how they all co-ordinate without having to think too much.

And then started looking through the stamps to see what I needed. She did mention she wanted the musical notes on there. Well, of course, its a piano recital! Only I do not have the musical wheel (yet :-) ). So onto my lovely friend Michelle to ask to borrow a couple of things (once again, thanks Michelle <3 )

And then we started on the work.....took a while to come up with something I was truly happy with, but this is the end result and I was SO happy with it!!!

The program all closed up.
Side view to see all the 3D details.

All opened up
Side profile
From above, gives you a slightly better appreciation of the 3D work.
 All lined up and ready for delivery
The invite for the recital


 All ready...all 10 of them
 Side view

Well this was probably the project that I enjoyed the most so far, must be the pink and wasabi and the butterflies I guess. Or the thought that spring is around the corner :-)

Hope you like it as much as I did.

Hugs,
Renate
This past January was the birthday of one of my  girlfriends, Marta, from Connecticut, (If you are not one of my friends, quick crash course in Krogdahl moving history: Jamie and I lived in Sydney for 2 years, CT for 3, Shanghai - Yes, the China Shanghai- for 15 months - could not handle more :-) - , then back to Australia, Melbourne this time for 3.5 years and now back to the States for the time being. Yes, we have moved more than the gypsies with the caravans and the road has taken us to many wonderful places and we have made great friends everywhere). We have been very blessed indeed.

Anyway, back to my friend in CT. I had no idea what to get her for her birthday and one day when I was browsing the Stampin' Up Catalogue came past these wonderful perennial birthday calendars. And I thought, what a GREAT idea. I think this is a great idea as a present as it is something more personal.

The calendar comes completely blank, and I decorated each and every page with a different theme matching the months of the year - well hers was matching the us calendar, july with 4th of july,  november with thanksgiving and January with snowflakes. 

So, less talk more pictures, here is the completed result.

FRONT of the calendar, that was of course nicely wrapped and more ribbon attached :-) 


For February I used a Stampin up Sale-a-Bration set called Sprinkled expressions. And I embossed the heart in red. It is from a retired Stampin Up stamp set called Always. You will see this one featured again and again, there is also a fabulous bird that I really love. Which is actually on the next page :-)

For march I used The Always set again for the bird this time, and Precious Butterflies.

For April I seed the tree, bird and sentiment from Best of Everything set, and added the flowers from Itty Bitty Bits.

Not sure if you can tell, but the little flowers on the trees have been stamped individually and punched and then attached with 3D foam for the pop up effect :-)

May has a lovely butterfly theme that uses a wheel

For June I used a new stamp set called Mixed Bunch and the Printed Petals one


For July I used the star stamp from the Sprinkled Expressions set (same one I used for february with the heart) and Also heat embossed the white star. Not so visible in the picture.


This set is called Little Friends and it's one of those that I saw and I HAD TO HAVE, I thought the kids were just adorable. And the little puppy and red wagon are too cute to resist. Was not sure what to use for the summer, as I did not have a summery beachy stamp set, but then thought the kids were just perfect.


September saw a wood-themed page, with the stamp sets Fox and friends and Funky Four. Also could not help it, I had to add the owl, with the owl builder punch. Isn't she adorable??? The googly eyes are just irresistible! 


October is a good month for leaves and fruit, but also added the lovely pink flower for some contrast. This set is called Faith in Nature and you can get it a FREE from Stampin up with an order.


November is Thanksgiving month, so autumn coloured wreathes, some pumpkin pies, a thank you 3D add on and some lovely Designer Series Paper was all I needed for this page.


For December I used probably one of my favourite sets called Snow Swirled (some of you would have seen it previously on the Christmas cards I sent out). I love the Christmas tree in this set, the snowflakes are also adorable, but what I really like is that is has a Christian sentiment to go with it. And there aren't many that do ( I do own all the ones with a Christian sentiment, because I believe that is the reason we celebrate Christmas. We celebrate Christmas because Christ came on this Earth to redeem us, to save us from sin and give us the opportunity to have eternal life. I don't like the whole Happy Holidays or Season's Greetings business that takes Christ out of Christmas....It is called CHRISTmas for a reason)

I had to heat emboss all the elements on this page and it turned out stunning!!! Please excuse the wonky sentiment at the bottom, it was past midnight :-)


If you want one of these, I can either make them for you (just email me at downunderserendipity@gmail.com), the cost is $35 (which includes the cost of the calendar and all materials used). It can look the same or it can be customized with whatever themes you choose. For those back in Australia January would obviously NOT be snowflakes :-)))

Alternatively I also do classes and you can make your own calendar, cost is $15 per class (usually 2 hrs) plus the cost of the calendar.

Hope you enjoyed today's post, now I have to go I have a few girlfriends coming over for a project and I need not only to snip and cut, but also to come up with a design :-))

Hugs,
Renate
As promised on FB, got a chance and photographed some of the latest designs I have been working on. So here they are, hope you like them :-)

I really like this particular way to use the Top Note die, and love the 2 layers of it. The vase is made using an oval punch, a circle to create the top and scissors to cut the bottom straight.


 I tend to make a few colours and designs when I create and I really like the rich razzleberry colour! I Especially like the Ribbon and the metal buckle, but unfortunately they are both retired from Stampin' Up, so I am just using my stash for these ones


Inside of the card, used the outline from the top note :-)


 Liked the monocromatic look, especially with the old navy cardstock. It goes well with the very vanilla. For this one I used some organza with the brass buckle, and it is my favourrite by far!


Close up of the buckle detail :-) Yeap, I like it that much.


Old olive anyone? Well, enough of the brass buckles, here is some scruffy yarn I had in my ribbon stash. Oh, and mixed it up a little, moved from the little rhinestones to the pearls.


TWO Little LOVEBIRDS....Probably my favourite punch from Stampin Up is the bird builder. For the birds I just stamped a lovely flower pattern stamp onto very vanilla cardstock and then punched the bird. Used Chocolate chip for the body and tempting turquoise for the wings. Add some lovely Designer Series Paper (DSP) to the background, layer some chocolate paper and more DSP, this time on blue to match the birds and add some Chantilly Ribbon, and there you have it, a lovely easy card. I was not sure what I would use it for, so the sentiment is Just for you, so it could be used for any occasion really. The sentiment stamp is from a set called Tagtastic also by Stampin' Up (probably should not mention seeing as all my stamps are from them).


Same idea on sage background this time, and with a hardware frame from the hodge podge collection.


This is the card I made for the swap at the monthly get together with my stamping girlfriends. The flowers were made using a technique called paper quilling. Just add some DSP, a lovely scalloped edge, pearls, ribbon and buttons and you have a lovely card. And guess what? I did not use ANY stamps on this one.

 It's a lot of fun and the end result looks amazing! But I would not want to have to make 30 of these!!! 10 were enough for me.


Close up of the flowers.


I have also used my morning in a very productive way, I have finished my order for the 30 birthday invitations!!!! And here is the proof


Now I just have to make the matching thank you cards, stamp the back and put the inside piece with all the party details and it will be my first completed order. Now I just have to start working on the other pending ones....

That's it for tonight, hope you enjoyed my creations and hope you come and visit often. Feel free to share my page with your friends :-)

Hugs,
Renate

PS. Thanks to my beautiful sister-in-law for proof reading and pointing out the mistakes :-). We can swap professional services